Choose resistance bands by matching the type to your goal, space and experience: loop bands for glutes and pull-up work, tube or handled bands for pressing and pulling, and flat bands for stretching. Buy two adjacent levels rather than a large multi-pack, and compare bands by feel because colour coding is not standardised.
Strength and muscle building needs heavier tension and a door anchor, while mobility work needs lighter, longer bands.
Beginners should start with two or three levels, not a ten-piece set.
Loop bands suit legs, glutes, hips and pull-up progression; tube bands add handles for presses and rows.
Latex offers the most consistent elastic resistance, while TPE is latex-free and skin-friendly.
A starter set for a small flat needs a light-to-medium loop band pair, one heavier band and a long flat band.
Not sure which band level to start with?Infinite Finds stocks latex-free TPE sets, fabric loop bands and heavy assistance bands with free delivery.
Choosing resistance bands for home workouts starts with three questions: what you want to achieve, how much floor space you have, and how much training experience you bring. Answer those honestly and the shortlist narrows fast. This guide walks through the types, levels and materials so you buy once rather than three times.
Many people get this backwards. They buy a cheap multi-pack online, discover some bands are too light or too heavy, and stop using them. A common mistake is buying by colour rather than by tension.
A Simple Decision Path Before You Buy
Work through these in order:
Goal: strength and muscle building needs heavier tension and a door anchor. Mobility, stretching and rehabilitation need lighter, longer bands.
Space: a small flat needs loop and mini bands. A spare room or garage can take a door anchor and a pull-up bar.
Experience: beginners should start with two or three levels, not a ten-piece set.
Budget: expect to pay more for layered latex or fabric construction, and less for moulded TPE.
That path takes about two minutes and saves most of the returns.
Resistance Band Types: Loop, Tube, Flat and Handled
Resistance band types fall into four families: loop bands (including mini and power bands), tube bands, flat bands, and handled bands. Each suits different exercises, and most home setups end up using two of the four.
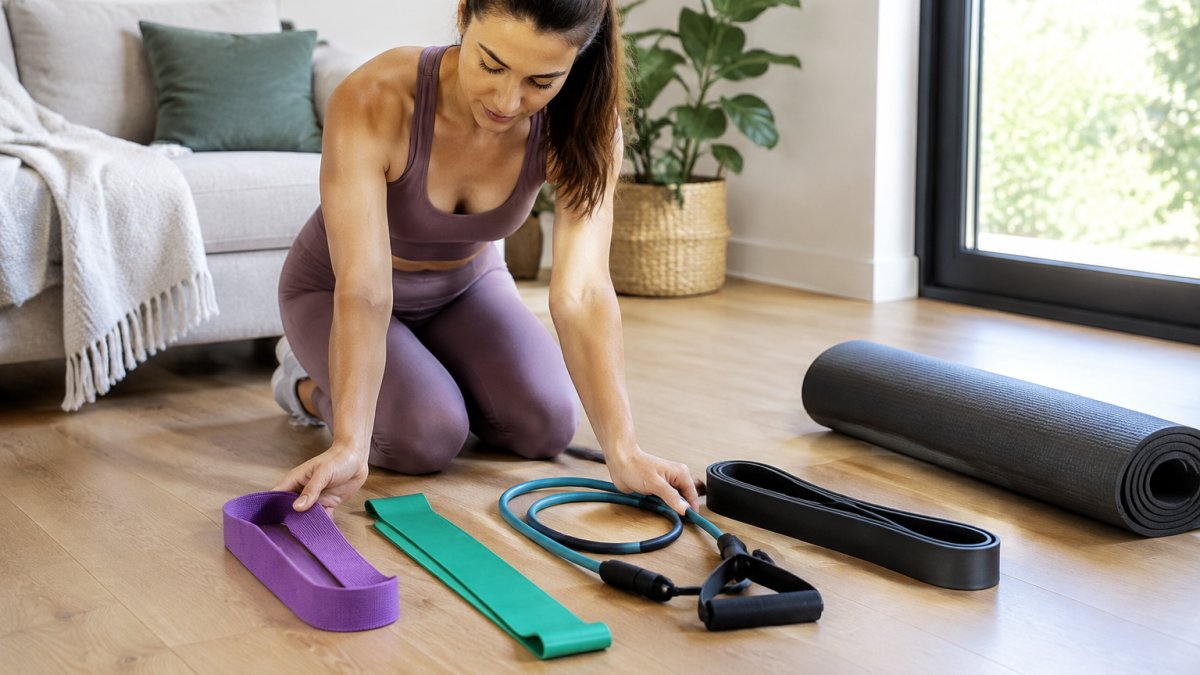
Woman arranging fabric loop, flat, tube, and power bands on a wooden floor near a yoga mat
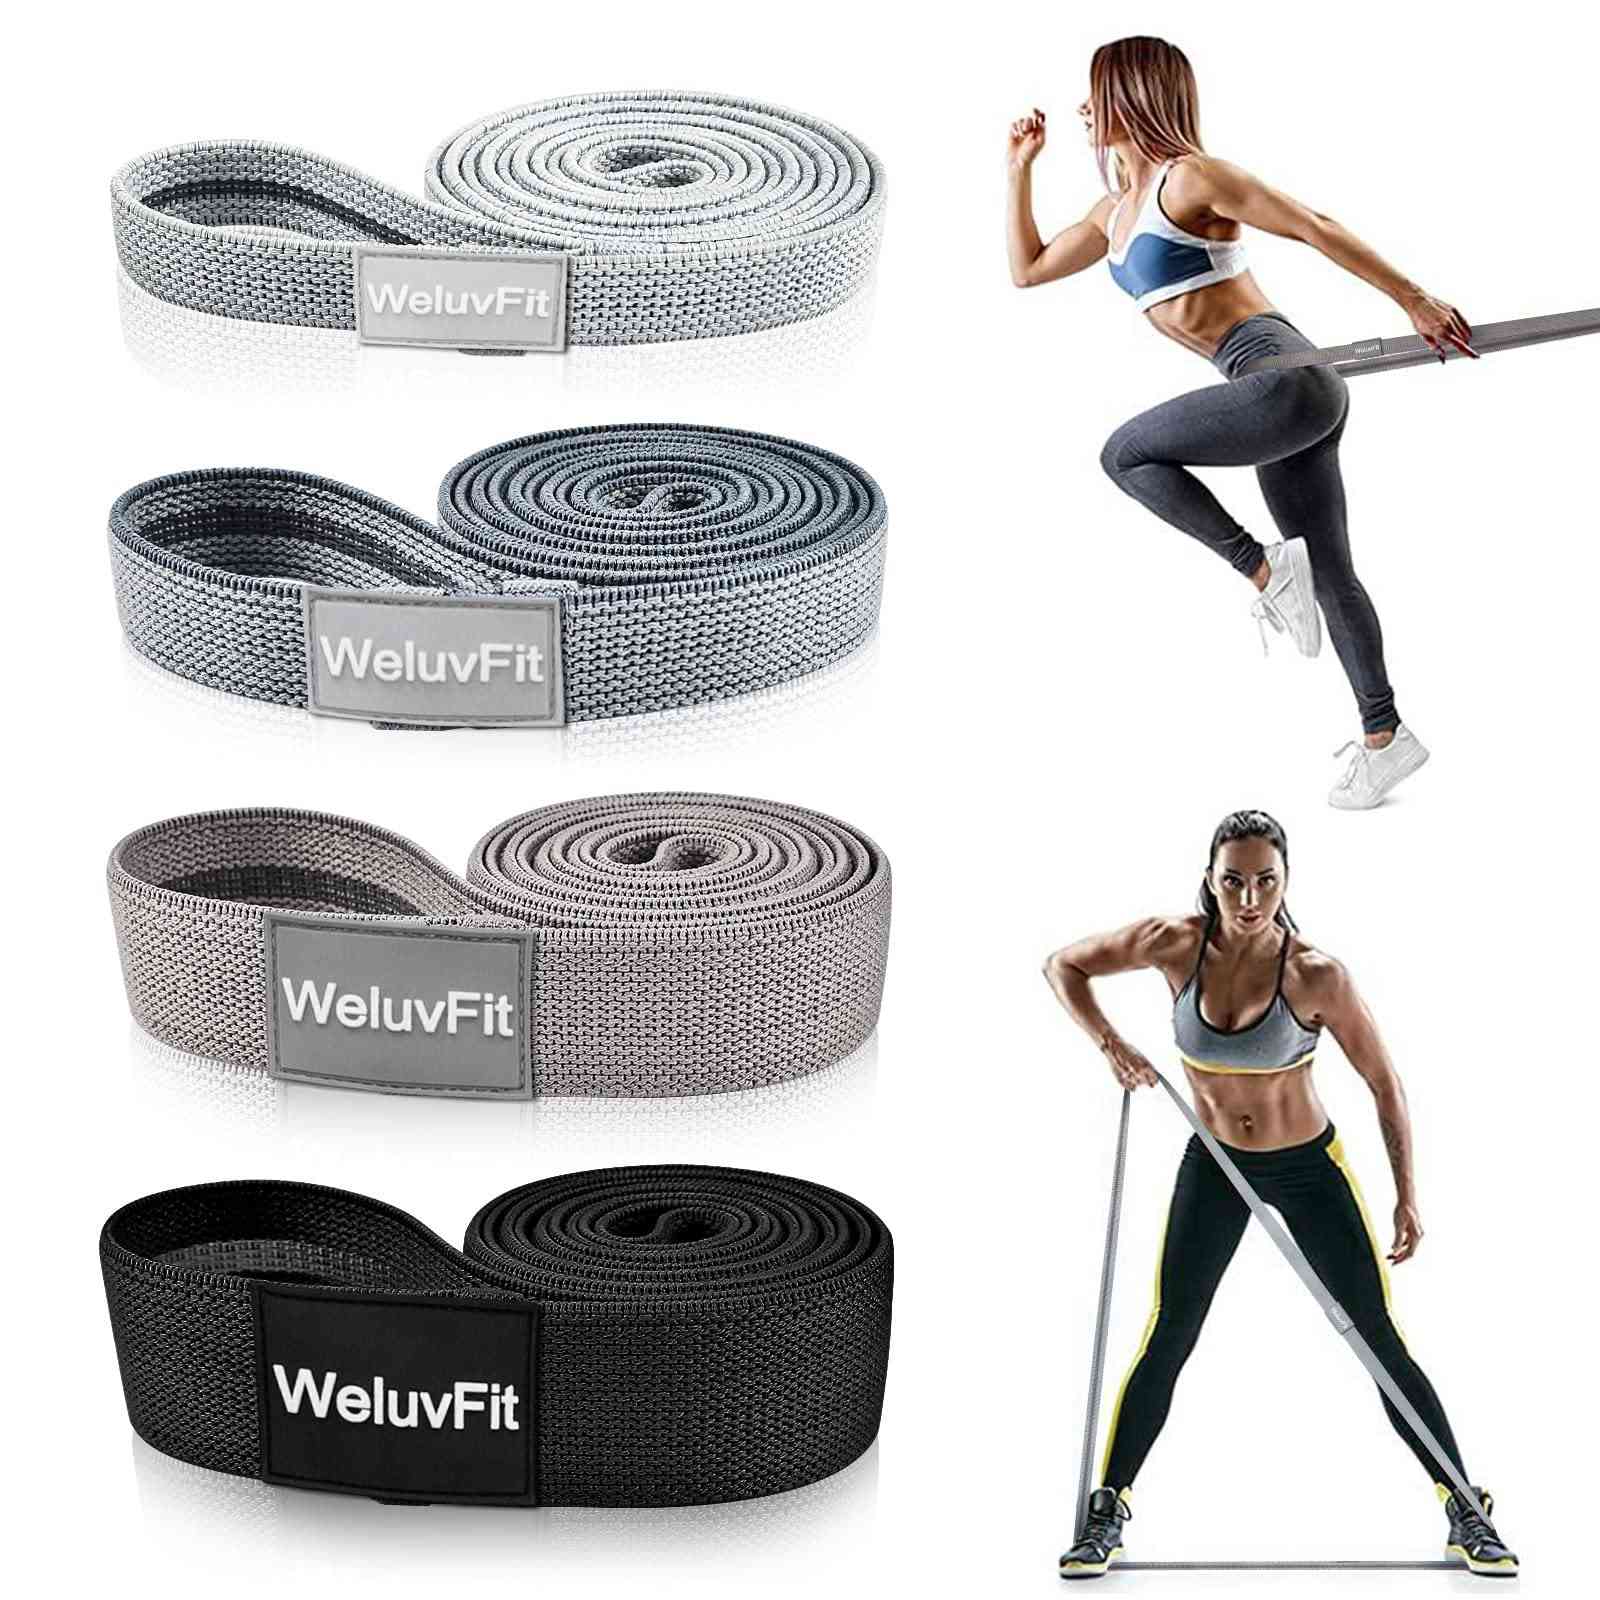
Loop bands are continuous circles.
The fabric resistance band set is one example of the loop type, with four resistance levels and a non-slip rubber grip layer that helps prevent rolling up during exercise.
Fabric Resistance Band Set | Workout & Strength Training
Type
Best For
Typical Limitation
Loop / mini band
Glutes, hips, mobility
Limited upper-body range
Power band
Pull-up assistance, heavy lifts
Bulky to store
Tube band
Rows, presses, curls
Handles can slip
Flat band
Stretching, rehabilitation
No handles or anchor
Handled band
Full-body cable-style work
Anchor point required
Resistance Band Levels and Colour Coding Explained
Resistance band levels describe how much force a band produces when stretched, and colour coding is the industry's shorthand for those levels. There is no universal standard. One brand's red is another brand's medium, and a "heavy" tube band may pull lighter than a "medium" loop band from a different maker.
That inconsistency is the single biggest source of bad purchases. Treat colour as a label, not a measurement.
Why the Number on the Pack Is Only a Starting Point
Band resistance is not a single fixed value. The force a band produces rises as it stretches, so a band rated at 10 kg may produce that figure only at a stated elongation, often 100% or 200% of its resting length. Two bands with the same headline rating can feel completely different if one reaches that figure at a shorter stretch.
Most practitioners find that the useful comparison is not the peak number but the shape of the curve: how quickly tension builds through the first part of the range. A band that feels light at the start and heavy at the end suits pressing and pulling; a band that builds tension early suits glute work and lateral movement.
When you read a product listing, look for three things:
The stretch point: does the stated tension refer to the band at rest, at 100% elongation, or at full stretch?
The unit: kilograms and pounds are not interchangeable, and some listings quote both without saying which is measured.
The construction: layered latex and moulded TPE behave differently, so a rating from one material does not transfer to the other.
Watch out: a rating that looks unusually high for the band's width and thickness is often measured at the point of failure rather than working load, assume it is optimistic and buy the next level down if you are unsure.
How to Compare Bands Without Relying on Colour
A practical method is to build your own reference point. Take a band you already own and know well, anchor it at a fixed point, and note how far you can stretch it before the tension feels like a hard effort.
For a first purchase, buy two adjacent levels rather than one. A light band for warm-ups and shoulder work, a medium or heavy band for squats, rows and presses. As your strength improves, add the next level up. That is progressive overload with bands, and it works exactly as it does with weights, but only if you can tell the levels apart by feel rather than by label.
If you are buying a multi-pack, check whether the levels are evenly spaced or clustered at the light end. Many budget sets include four light bands and one heavy band, which limits how far you can progress before needing to buy again.
Loop Bands vs Tube Bands: Which Suits Your Training?
Loop bands win for lower-body and pulling work; tube bands win for pressing and pulling movements that need handles. The choice comes down to exercise selection rather than quality.
Loop bands stay in place around the thighs and ankles, which makes them better for glute exercises, lateral walks and hip work. They also anchor easily to a rack or bar for assisted pull-ups. The pull-up assistance bands are made using a layered manufacturing process, which the listing describes as more durable than single-piece moulded bands.
Tube bands with handles feel more like gym cables. They suit rows, chest presses, shoulder presses and bicep curls, and the door anchor opens up a surprising amount of range in a small flat. The trade-off is that handles can slip under heavy tension, and cheap clips are a weak point.
Choose loop bands if: your focus is legs, glutes, hips, or pull-up progression.
Choose tube bands if: you want pressing and pulling variety with handles.
Choose both if: you train full-body twice a week or more.
Materials, Durability and What the Ratings Really Mean
Band material determines how long a band lasts, how it feels against skin, and whether it is safe under load. The main options are natural rubber latex, synthetic TPE, and fabric with an elastic core.
Latex offers the most consistent elastic resistance and the best snap-back. It is also the material most likely to trigger an allergy, and it degrades with heat, sunlight and oil. TPE is latex-free, odourless and skin-friendly, which makes it the better pick for anyone with a latex sensitivity.
WATCH OUT: manufacturer tension ratings are often measured at a specific stretch point, and some are measured at the point of failure rather than working load. If a rating looks unusually high for the band's width and thickness, assume it is optimistic.
Inspect bands before every session. Run them through your hands looking for nicks, chalky patches, or thinning near the anchor point. Retire any band with a visible tear, whatever its age.
How to Use Resistance Bands Safely at Home
Safe band training comes down to three habits: anchor properly, inspect before use, and never let a band recoil toward your face. Bands store energy, and a failed band releases it fast.
Anchor Points and Door Setup
A door anchor is the most common attachment in a home setup, and it is also where most failures happen. Fit the anchor over the hinge side of a door that opens away from you, and lock the door before loading the band. The anchor strap should sit in the gap between the door and the frame, not over the latch or handle.
Never anchor to a handle, a radiator, a curtain rail, or anything that could pull loose. Check that the band is seated in the anchor and not pinched on a sharp edge, a pinched band concentrates stress at one point and is far more likely to tear.
If you use a pull-up bar or rack, loop the band over a smooth, rounded surface. Rough metal or sharp welds will nick the band over time.
Inspection Before Every Session
Run each band through your hands looking for nicks, chalky patches, or thinning near the anchor point. Pay particular attention to the area that sits in the anchor or under a foot, because that is where wear concentrates.
Retire any band with a visible tear, a deep nick, or a section that has gone noticeably thinner or lighter in colour, whatever its age. A band that has been stored in direct sunlight or near a heat source will degrade faster than the packaging suggests.
Watch out: a band that has been overstretched, pulled well beyond its rated elongation, may look intact but have lost elasticity in one section, which changes how it loads and makes it more likely to snap under tension.
Loading and Range of Motion
Start with the band at around 1.5 times its resting length, not at full stretch. Build tension gradually through the movement rather than snapping into the end range. Control the return phase; do not let the band recoil.
Keep the band away from your face and neck during pressing and pulling movements. If a band fails, it will travel back toward the anchor point, so position yourself so that path does not cross your head.
Warm up with a light band for five minutes before loading heavier tension.
Stop immediately if you feel a sharp pull in a joint rather than muscle tension.
Store bands flat rather than hanging on a hook, which stretches one section permanently.
Avoid oil-based lotions on your hands before use, as these degrade latex.
If you are returning from an injury, get clearance from a physiotherapist before loading the affected area. Bands are widely used in rehabilitation, but the progression should be guided, not guessed.
Building a Starter Set for a Small Home
A starter set for a small flat needs three things: a light-to-medium loop band pair, one heavier band for lower-body work, and a long flat band for stretching. That covers most of a full-body programme and fits in a drawer.
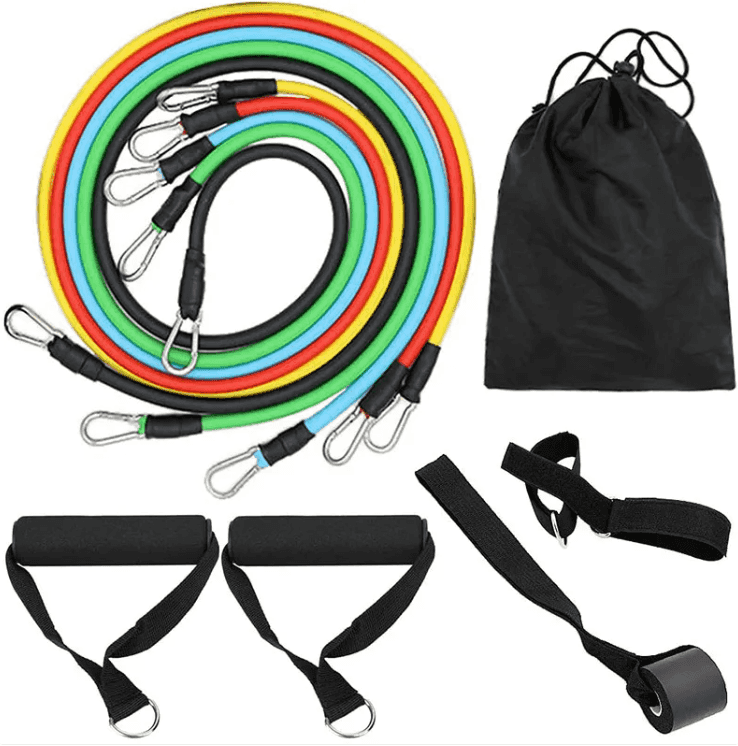
The 11-piece TPE resistance training band set is a compact pack suited to a first purchase. Consider a heavier option once the lighter bands feel easy across your sets.
11-Piece TPE Resistance Training Band Set | Body Workout
Skip the door anchor and pull-up bar until you know you will use them. They take up space and add cost, and the exercises they unlock are not the ones most beginners start with.
Pick Your Set and Start Your First Session
Decide now rather than researching for another fortnight. Pick a type based on your main goal, buy two adjacent resistance levels, and book three sessions into your week before the bands arrive.
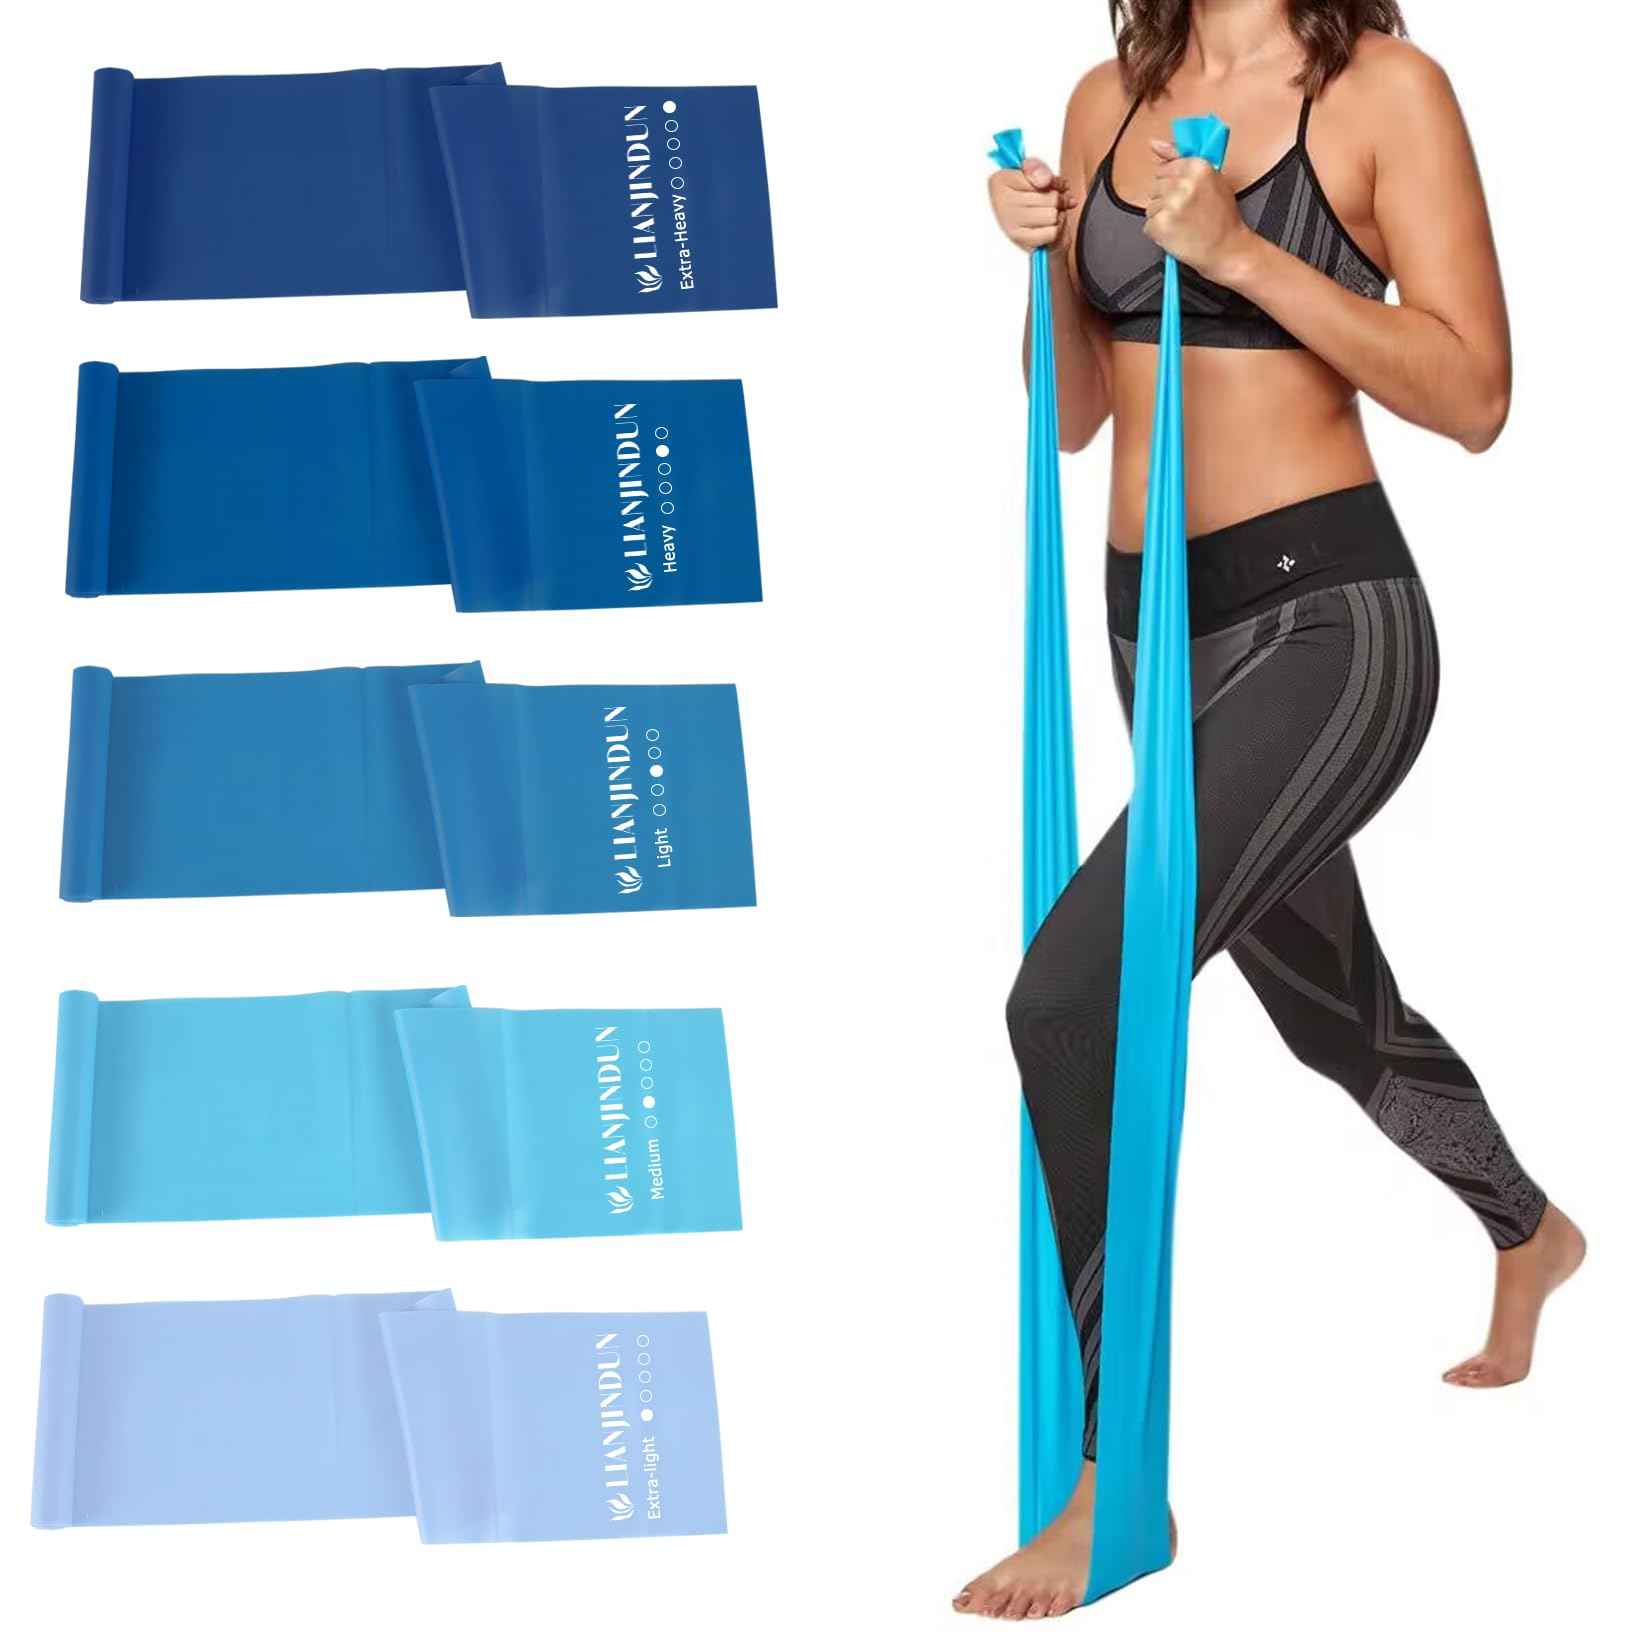
If you want a single purchase that covers the basics, the resistance bands set for home workouts gives you five levels from X-Light to X-Heavy, made from latex-free TPE, with a 59" length for whole-body stretching and training.
Resistance Bands Set for Home Workouts and Fitness Training
Your first session should be short: five minutes of band warm-up, three sets each of a squat, a row and a press, then five minutes of stretching. Add one rep or one level per week. That is the whole progression.
The hardest part of band training is not the exercise, it is buying the right bands the first time. At Infinite Finds, we stock a curated fitness range with free delivery available, including latex-free TPE sets, fabric loop bands and heavy pull-up assistance bands, so you can build a setup that matches your space and your level.
Frequently Asked Questions
What type of resistance band is best for home workouts?
It depends on what you want to train. Flat and loop bands cover squats, rows, presses and stretching with very little space, while tube bands with handles and a door anchor add pulling angles for upper-body work. For a first set, a combination of loop and flat bands covers most home routines. If you already train pull-ups or heavy lifts, add a power band for assistance and extra load.
How do I choose the right resistance band level?
Start lighter than you think you need. Pick a band you can move through a full range of motion for 12 to 15 controlled reps, then step up when the last few reps feel easy. Colour coding is not standardised between brands, so check the stated resistance in kilograms or pounds on the pack rather than trusting the colour alone. A set with five levels lets you progress without buying again.
Are loop or tube bands better for beginners?
Loop bands are usually the easier starting point. They stay in place around the thighs or ankles for glute work and cost less, and flat loop bands work well for rows and presses. Tube bands with handles are more comfortable for pulling exercises and let you attach a door anchor, but the handles and clips add parts to check before each session. Many people end up using both for different movements.
How do I know if a resistance band is too strong?
If you cannot complete 8 to 10 reps with steady form, or you find yourself leaning, swinging or shortening the movement to finish, the band is too strong. Drop to the next lighter level and build up. Also check the band before each use: look for nicks, cloudy patches, or a stretched section that no longer returns to shape, and replace it rather than risk it snapping mid-rep.